
Family Kitchen Design Ideas UK | How We Designed a Kitchen That Works for Real Life
How We Designed a Kitchen That Works for Real Family Life
The kitchen really is the heart of our home. It’s where we all meet in the mornings — whether that’s rushing around before school and work, or lingering over a long coffee at the weekend. It’s where we gather with friends and family, talk about our day, and cook together. Both Dan and I love being in the kitchen, so it’s usually where you’ll find one of us. And at the weekend, you’ll almost always find me dancing around the island to a good tune, cocktail in hand, it’s my happy place.
When we started planning our new kitchen at Living in Wisteria, we’d been cooking in a tiny, tired kitchen for nearly five years. So this time, it had to be beautiful, of course, but more than that, it had to work for our busy family life. We needed a space that was comfortable to cook and bake in, with plenty of work surface area, room for people to sit and chat, and space for Dexter to wander (always on the hunt for a stray crumb or two!).
More than anything, we wanted the kitchen to be practical, warm, inviting, and full of character — a space that reflected our family and the life we’ve built together here.
I know how overwhelming designing a kitchen can feel. There are so many decisions to make, and it’s easy to get caught up in how it looks rather than how it will actually work day to day. That’s why I wanted to share this blog post and walk you through the most important things we considered when designing our kitchen, and the choices that made the biggest difference for us as a family.
If you’re in the middle of planning your own kitchen (or dreaming of one for the future), I hope these steps help make the process feel a little clearer, calmer, and more enjoyable.
Step 1: Start With How You Actually Live
Before we even looked at colours or worktops, I spent time thinking about how we use the kitchen day-to-day. It’s the space where we always seem to meet and chat, especially with Harrison, who’s constantly hungry, a growing lad, and always off to the gym! It was important to create a space where my teenagers would actually stay for a while before disappearing back to their rooms, somewhere comfortable and inviting enough for them to sit and talk while we cooked.
Because both Dan and I cook and bake a lot (and often side by side), the kitchen needed to feel open and functional — big enough for us to move around freely without getting under each other’s feet, but still cosy and connected.
We’re quite social too and love having friends and family over, so it was important that the layout encouraged conversation. We designed it so there’s always seating available, people can perch at the island or nearby while we prep and cook, so no one ever feels cut off or isolated.
I do have a separate studio for my cake design business, but family baking is a big part of life at home, and having the space to do that comfortably means so much to me.
Tip: Don’t just design for how a kitchen looks. Design for how you move, cook, and live in it.
Step 2: Practical Kitchen Layout That Flows
We started with a square space that also had a small snug just off from it, so getting the layout right was key. From the beginning, I knew the island would be the centrepiece — the heart of the kitchen where everything happens. It needed to be big enough to prep, cook, and chat around, while still leaving plenty of space to move freely around it.
For me, the most important thing was making sure the kitchen worked as well as it looked. I wanted easy access to the key areas — the oven, fridge, and sink — but I also wanted generous workspace and clear flow.
I’ve never been a fan of sinks or hobs built into kitchen islands. Personally, I find they take up valuable prep space and disrupt the clean, social feel I wanted. I’m also a bit of a tidy freak (I’ll admit it!), so the thought of dirty dishes or drying racks sitting in the middle of the island where everyone gathers was a definite no. Instead, I wanted the island to stay clear and clutter-free — somewhere that invited people to sit, chat, or enjoy a glass of wine while I cooked.
My oven sits behind the island, with the fridge on one side and the sink on the other, which brings me to one of the most important elements of kitchen planning — the work triangle.
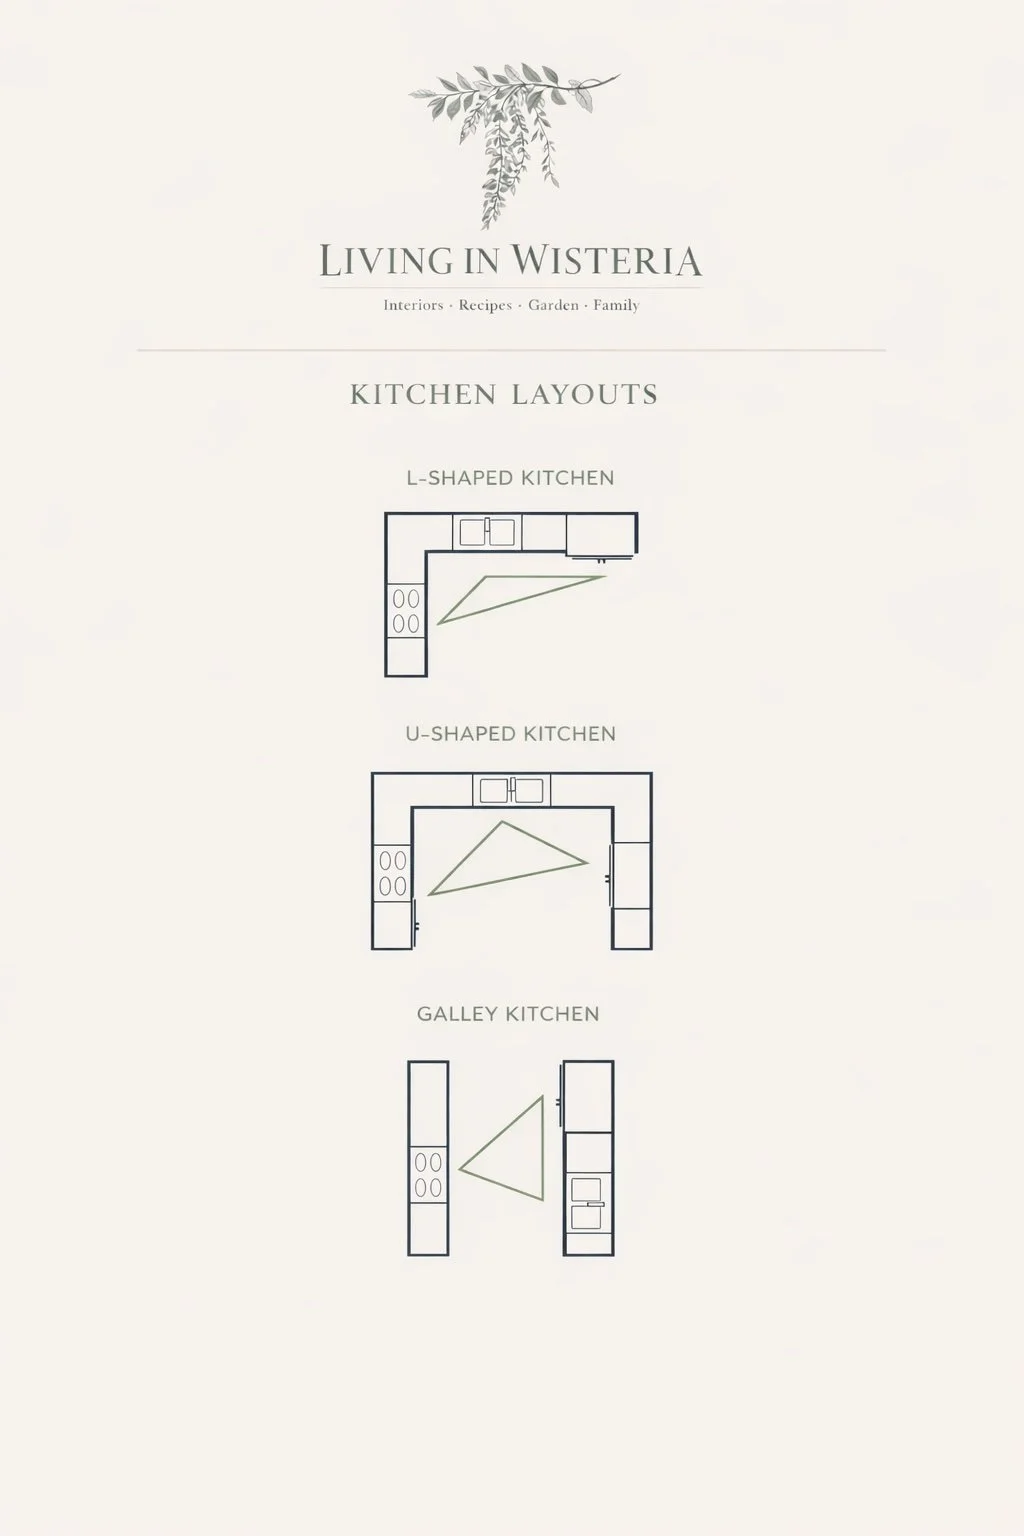
The work triangle is the invisible connection between your sink, oven, and fridge — the three main areas you use most often. Getting the distance between these right makes a world of difference. Too far apart and you’ll feel like you’re running laps; too close together and it becomes cramped and awkward. Once that triangle feels comfortable, the rest of the layout falls into place.
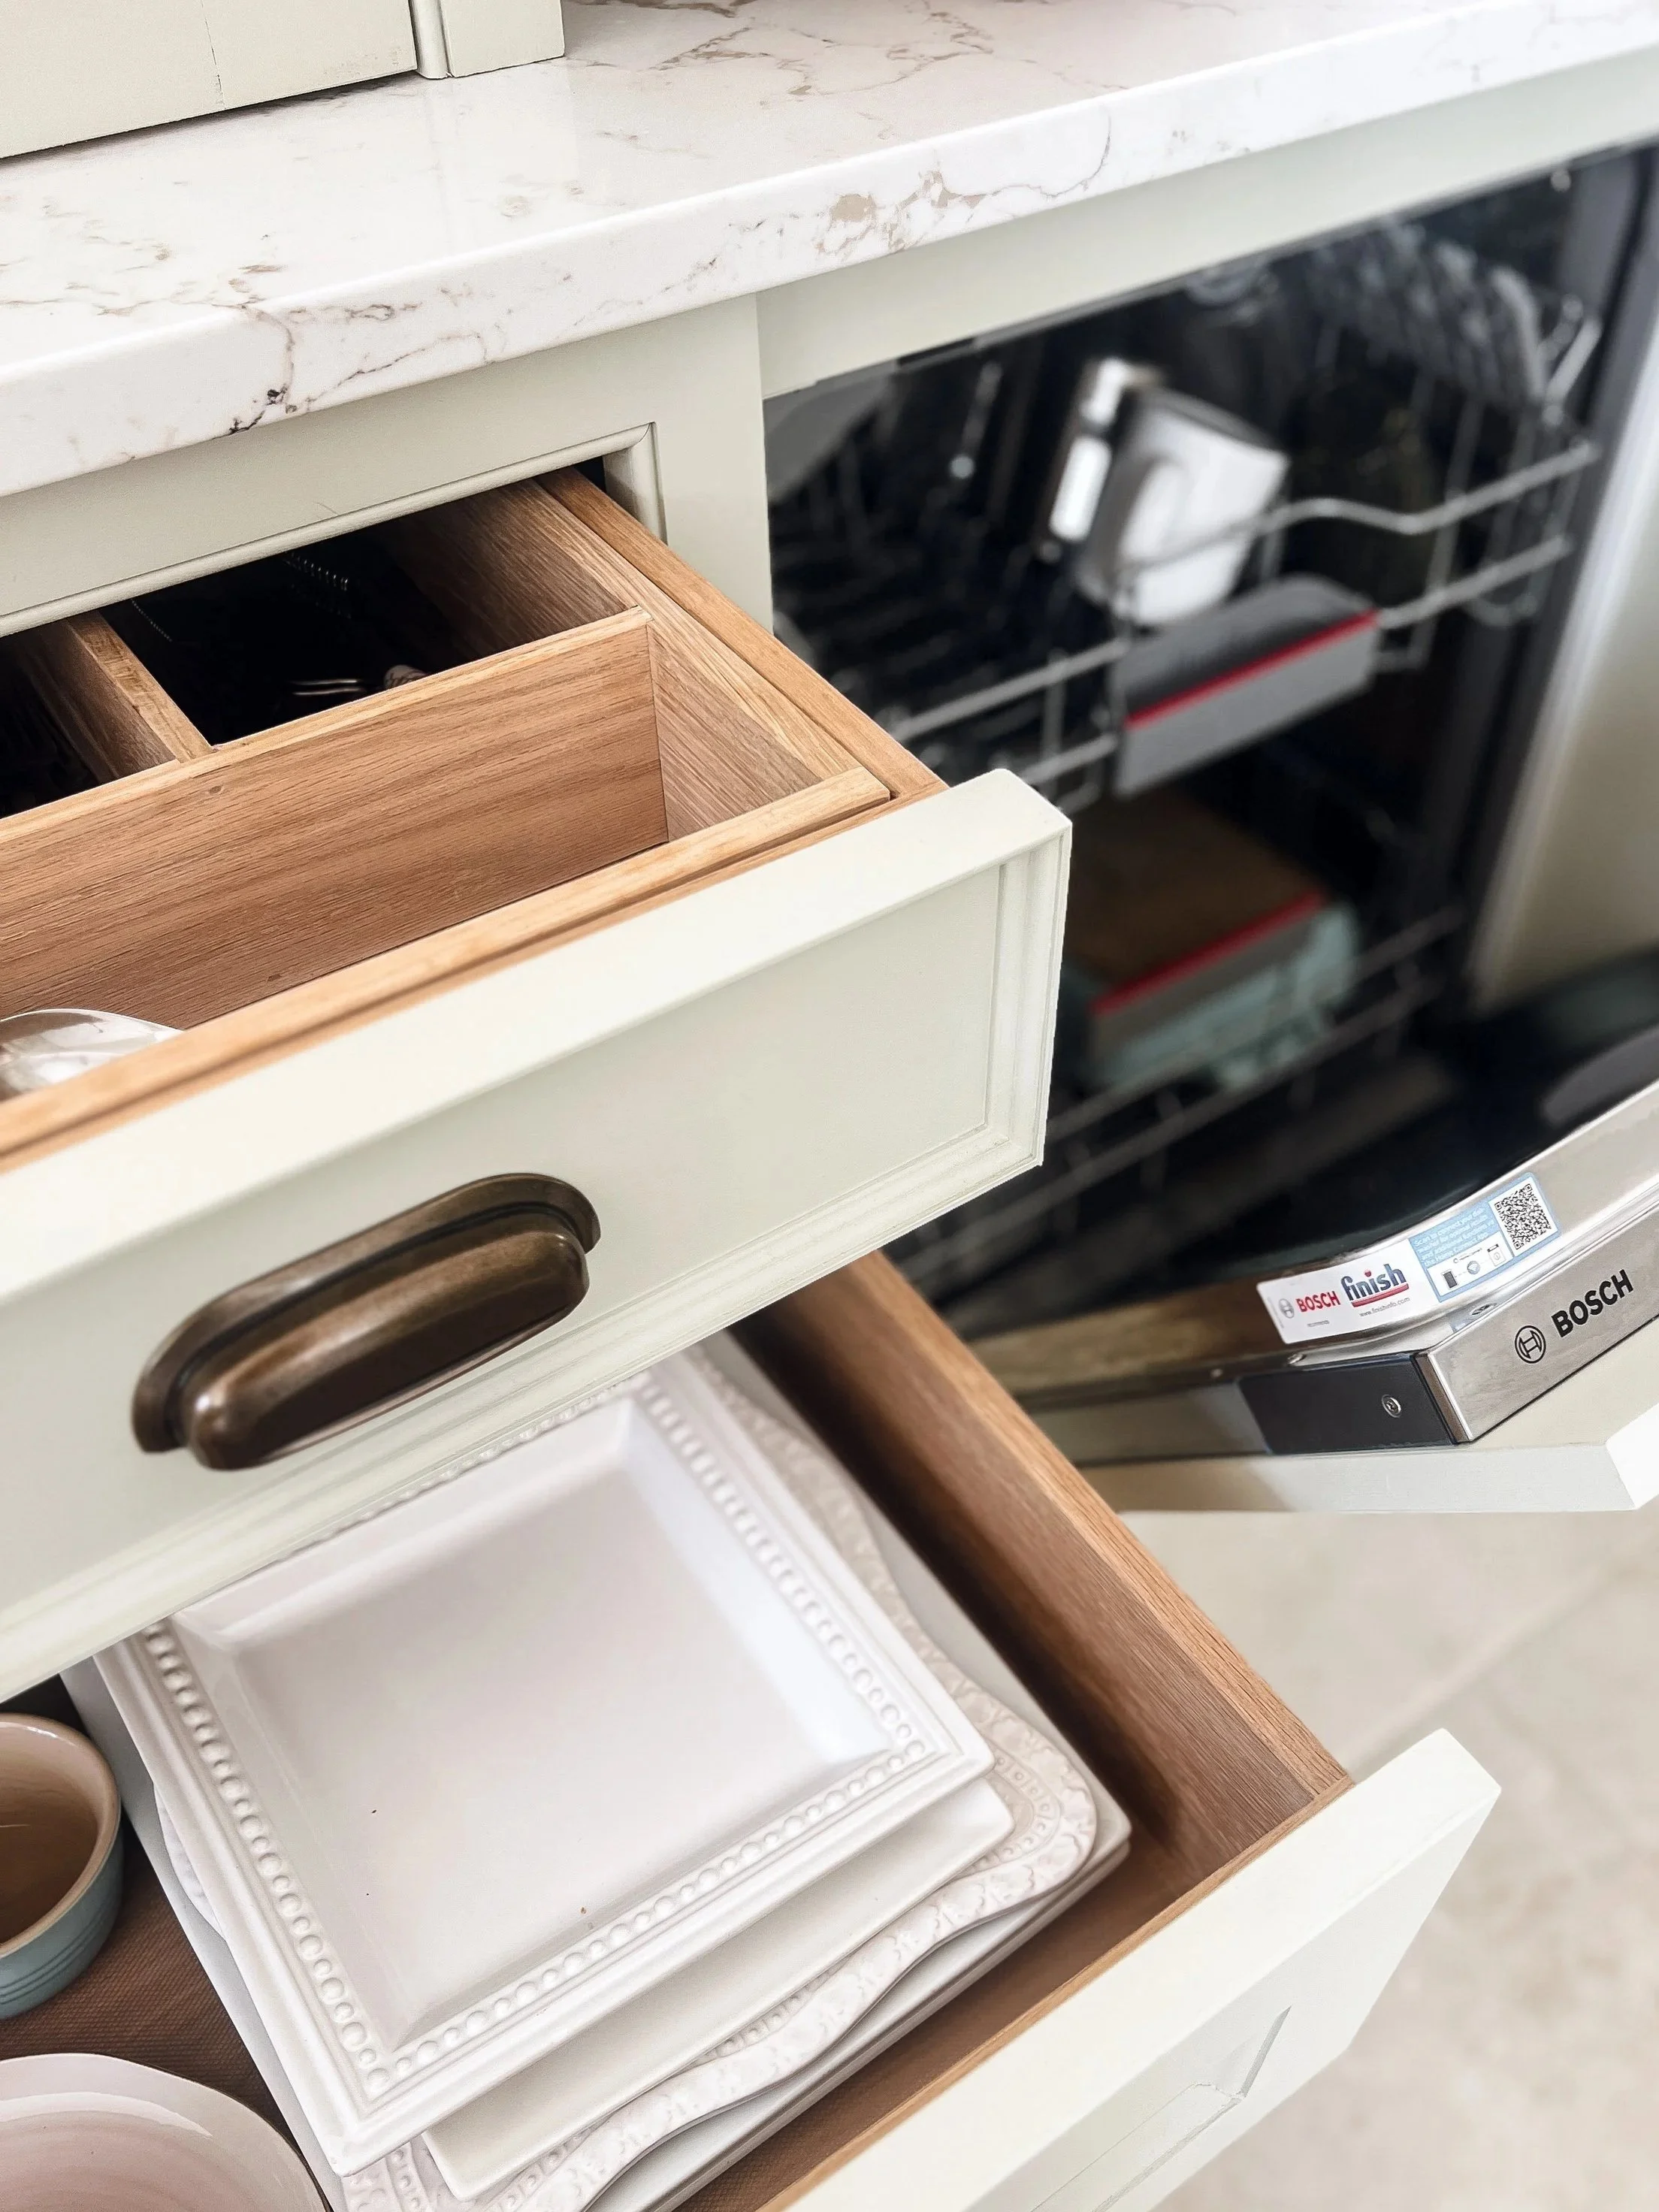
After establishing that triangle, I focused on the flow of everything else — the smaller but equally important details. For example, your bin should ideally sit on one side of your sink, with the dishwasher on the other. It sounds simple, but it’s essential for everyday use: scrape the food, rinse the plate, and pop it straight into the dishwasher without juggling around the room.
Finally, think carefully about the items you actually use every day — not just what looks nice in a showroom. Where do you want your kettle to sit? Where will you store chopping boards or baking trays? Planning around how you live makes the whole design process easier and ensures your kitchen feels natural and effortless to use.
Tip: Start with your work triangle — that’s the foundation. Then build the rest of your layout around your lifestyle and the way you move, cook, and gather in your space.
Step 3: Storage, Storage, and More Storage
I don’t think anyone has ever said, “I wish I had less storage.” From cake tins to dog treats, we needed space for everything — and then some!
One of the biggest things I wanted from our new kitchen was a proper pantry — a space I could close the door on and keep everything organised in one place. It’s one of my favourite features now. Inside, everything has a home: shelves for jars and tins, baskets for snacks, and cupboards for the bulkier bits. It’s made everyday cooking so much easier and keeps the kitchen itself feeling calm and clutter-free.
In the main kitchen, we went for deep drawers instead of standard cupboards, and honestly, it’s one of the best decisions we made. No more crouching down or rummaging at the back of a dark cupboard — everything is visible and accessible. From saucepans to baking trays, it’s all just easier to store and find in drawers.
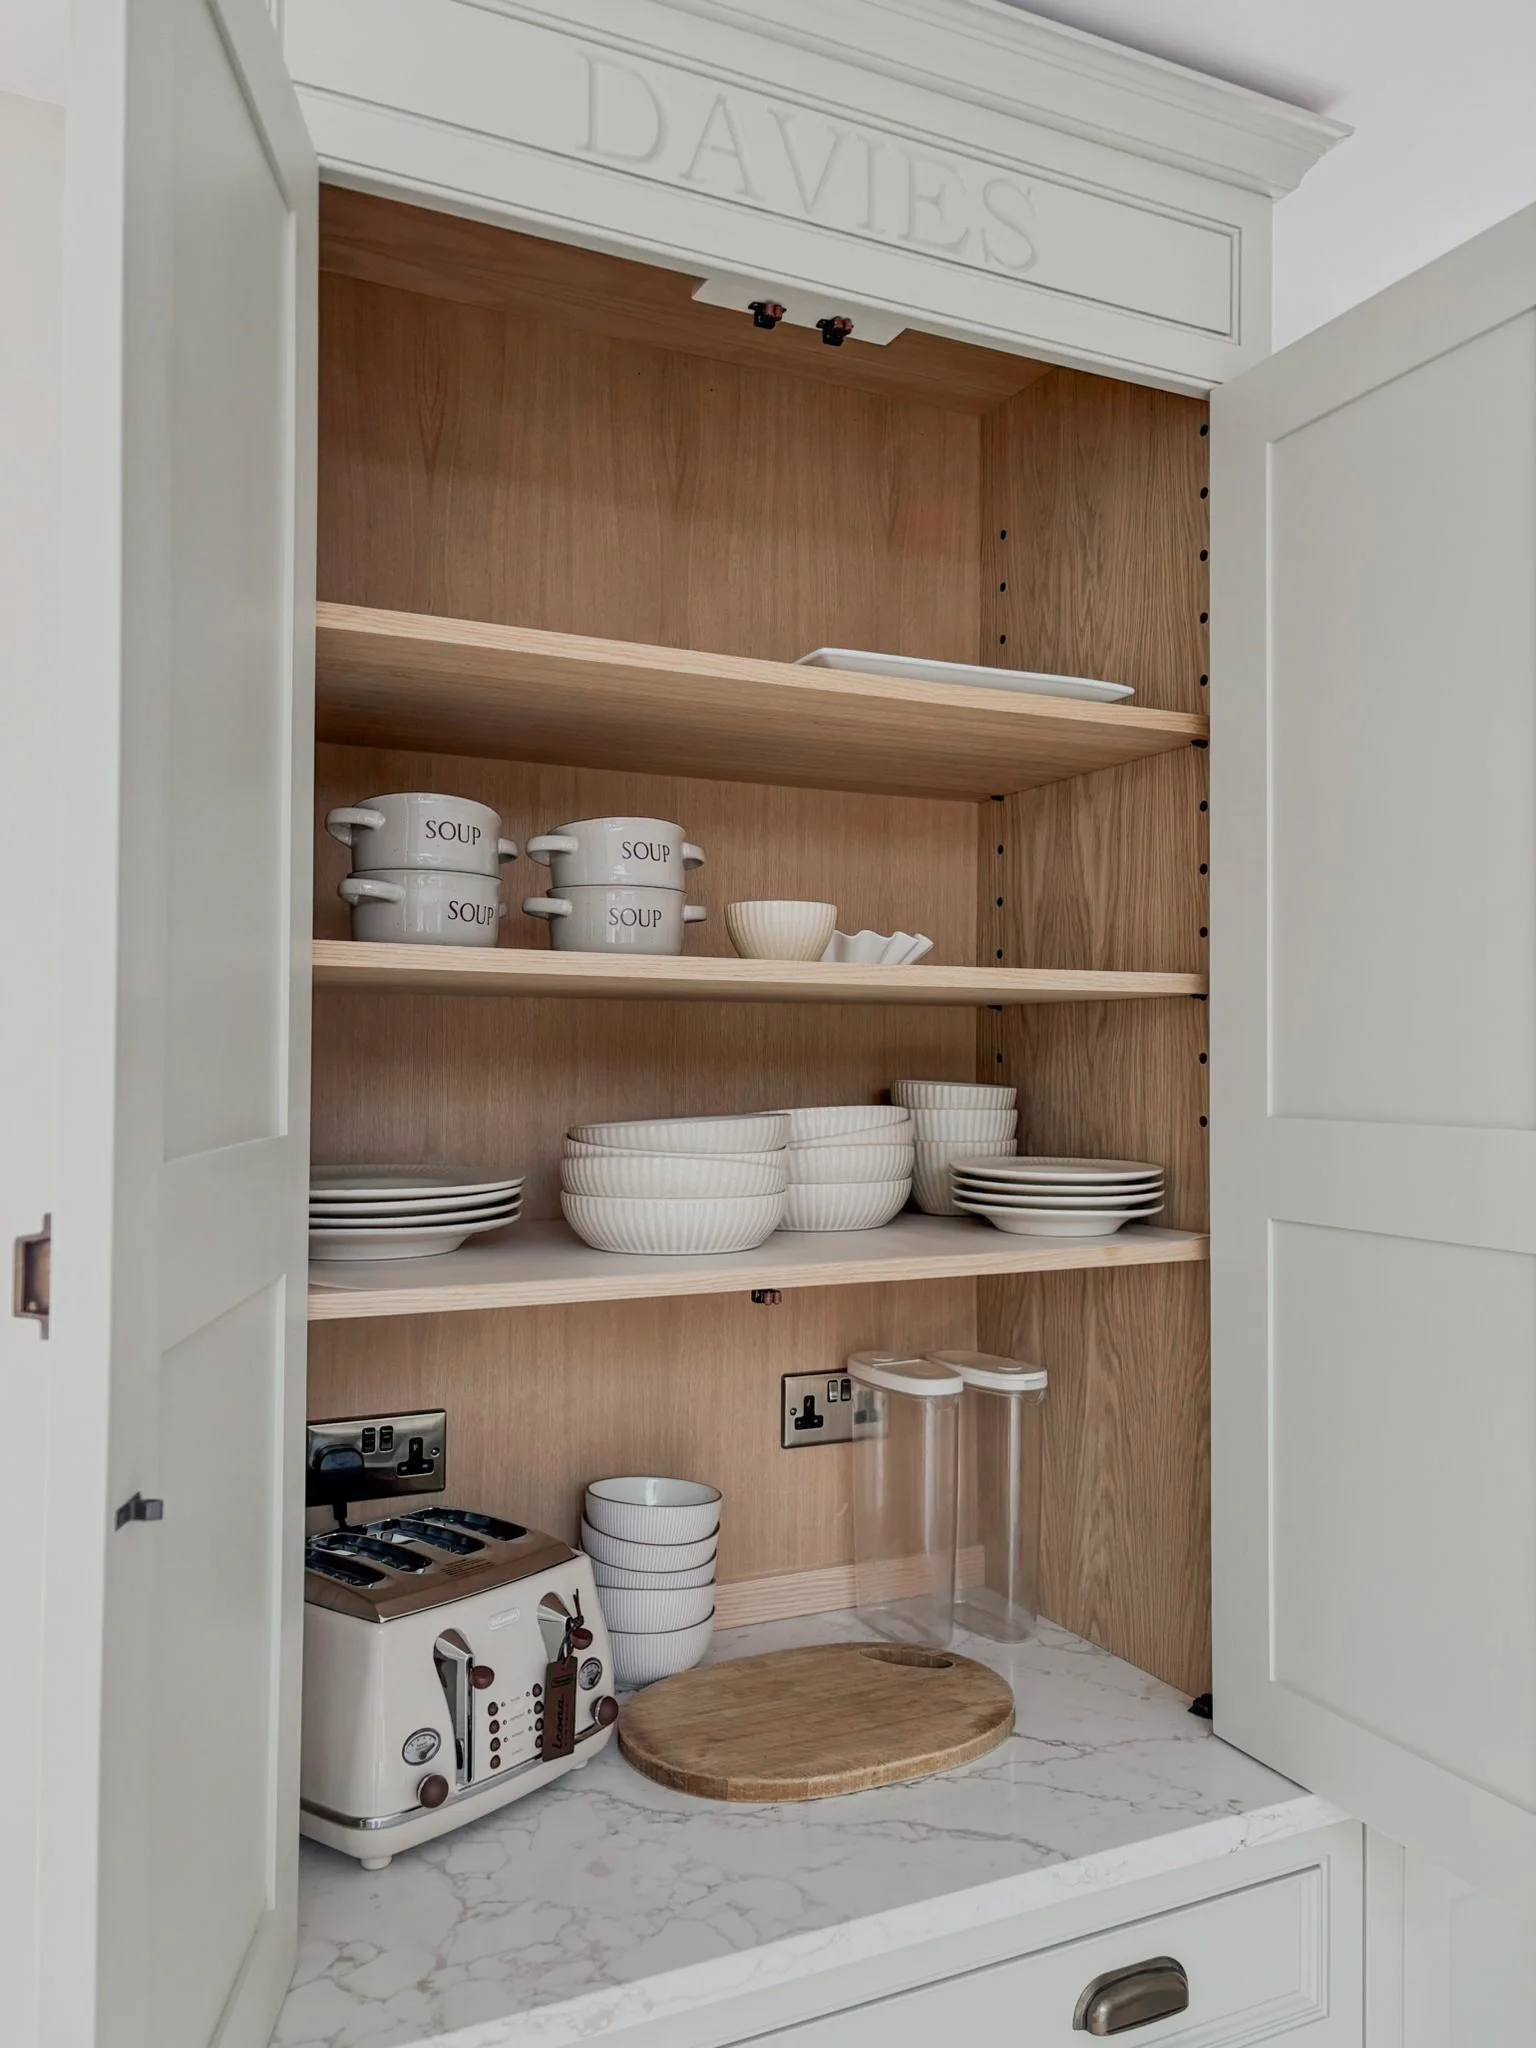
We also added two larder-style top cupboards, which I love because I prefer things tucked away rather than on display. One became a coffee and tea station — complete with kettle, mugs, the coffee machine, and all the essentials — and the other turned into a little breakfast zone. It has the toaster, cereals, bowls, and cutlery all together, positioned near the dining table, so it’s practical and quick for busy mornings.
Every bit of storage was designed with a purpose. The cutlery drawer sits near the dining area, utensils are close to the cooker, and there’s an extra utensil drawer in the island where I prep food. We even placed the glass cupboard next to the fridge because we have plumbed filtered water there — it just made sense.
Even the bin has its own pull-out cupboard beside the sink.
Once the doors are closed, the whole kitchen looks clean, uncluttered, and beautifully calm — exactly how I wanted it to feel.
Tip: Design your storage around how you live. Think about the flow of your day — where you make tea, prep dinner, or unload the shopping. Every item should have a home that makes sense. When you plan with purpose, you’ll create a kitchen that not only looks beautiful but works effortlessly too.
Step 4: Choosing Materials That Last
Quality was so important to me. I knew from the start that I wanted a bespoke wooden kitchen — something timeless, beautifully made, and designed down to the very last millimetre. Going bespoke meant we could create every cupboard and drawer exactly how we needed it, rather than trying to make a pre-set design fit into our space. It also means the kitchen will last for years to come, and because it’s wood, we can repaint it whenever we fancy a change. It’s an investment that will age gracefully and evolve with us.
When it came to painting, we did have a professional painter in — but let’s just say, a lot was missed, and I ended up doing it myself (a whole other story for another day!). Still, I actually loved being part of that process. There’s something quite special about putting your own brush to the walls and cupboards in a space you’ve designed yourself.
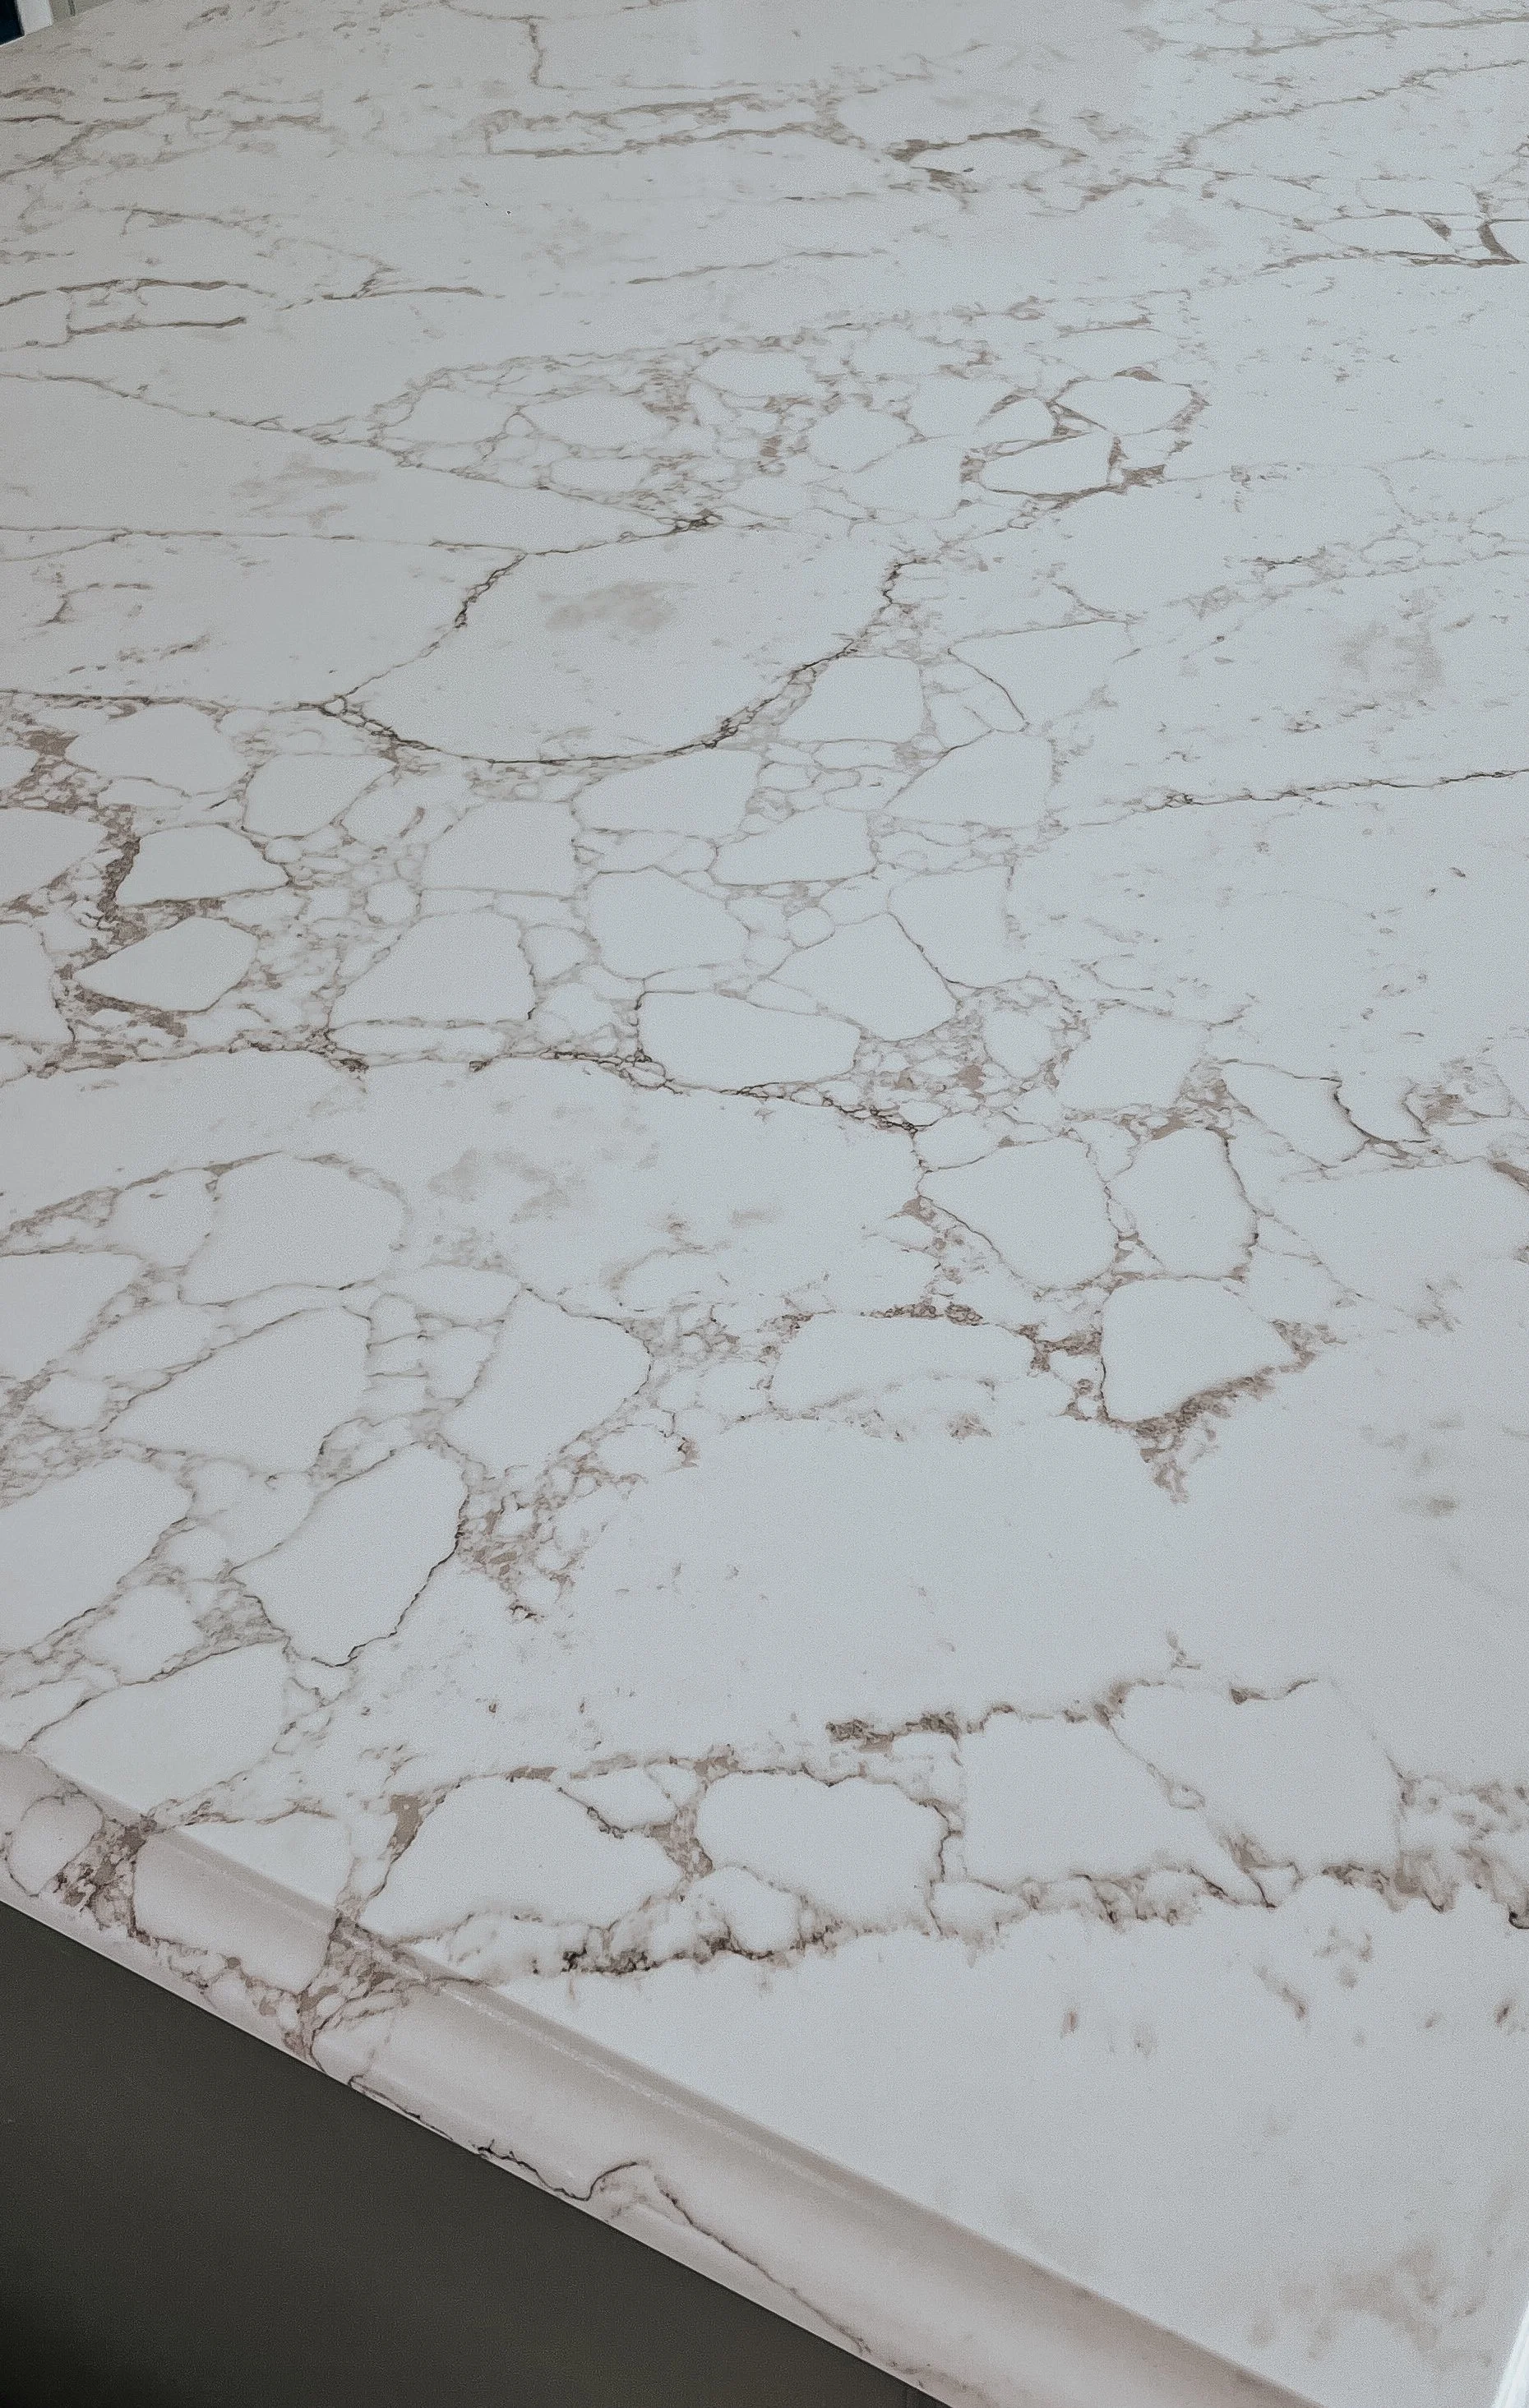
Our worktops were another big investment, and they had to be perfect. I’d always dreamed of quartz, and I can honestly say it was worth every penny. The small samples you get in showrooms don’t do them justice at all, they can look completely different in real life. So, I drove to the quartz workshop to see the full slabs in person, and I’m so glad I did. The piece I chose was completely different from my original sample, and it turned out to be one of the best decisions of the entire renovation. I loved it so much that I used it not only for the worktops but also as the splashback behind the cooker and across the back wall. It’s such a beautiful statement piece — elegant, practical, and something I genuinely adore every single day. We chose Lydia Gold quartz.

The sink and taps were just as important to me. I went for a double Belfast sink because I love the classic, functional look, and I knew I didn’t want a hot water tap — it’s just not for me. There’s something soothing about boiling the kettle and making tea the old-fashioned way. My bronzed tap was one of those small details that completely elevated the space, and my matching pot filler tap by the cooker (a dream of mine for years!) has been a game changer. It makes cooking so much easier — and it looks absolutely stunning too.
When it comes to kitchens, it’s easy to get carried away, but here’s what I learned: make a list of your non-negotiables — the things that really matter to you and your lifestyle. For us, it was the craftsmanship, the worktop, and the taps. Invest wisely in the areas that will last and bring you joy every day.
Tip: Create a list of what’s worth spending on and what you can save on. Paint colours and handles can always be changed later, but your layout, cabinetry, and worktops are long-term investments — make sure you love them. And remember: buy once, buy right… you don’t want to pay twice!
Step 5: Lighting Makes All the Difference
Lighting was one of the trickiest — and most important — parts to get right. We’re lucky to have lots of natural light during the day, but I really wanted the kitchen to feel warm and inviting in the evenings too.
In our last house, the previous owners had fitted rows of spotlights that honestly looked like a landing strip at an airport — and I hated them! So, this time around, I was determined to be more intentional. I knew we needed a few spotlights for practical, task lighting (you can’t really avoid them), but I wanted to layer in softer, more atmospheric light that gave each area its own personality and purpose.
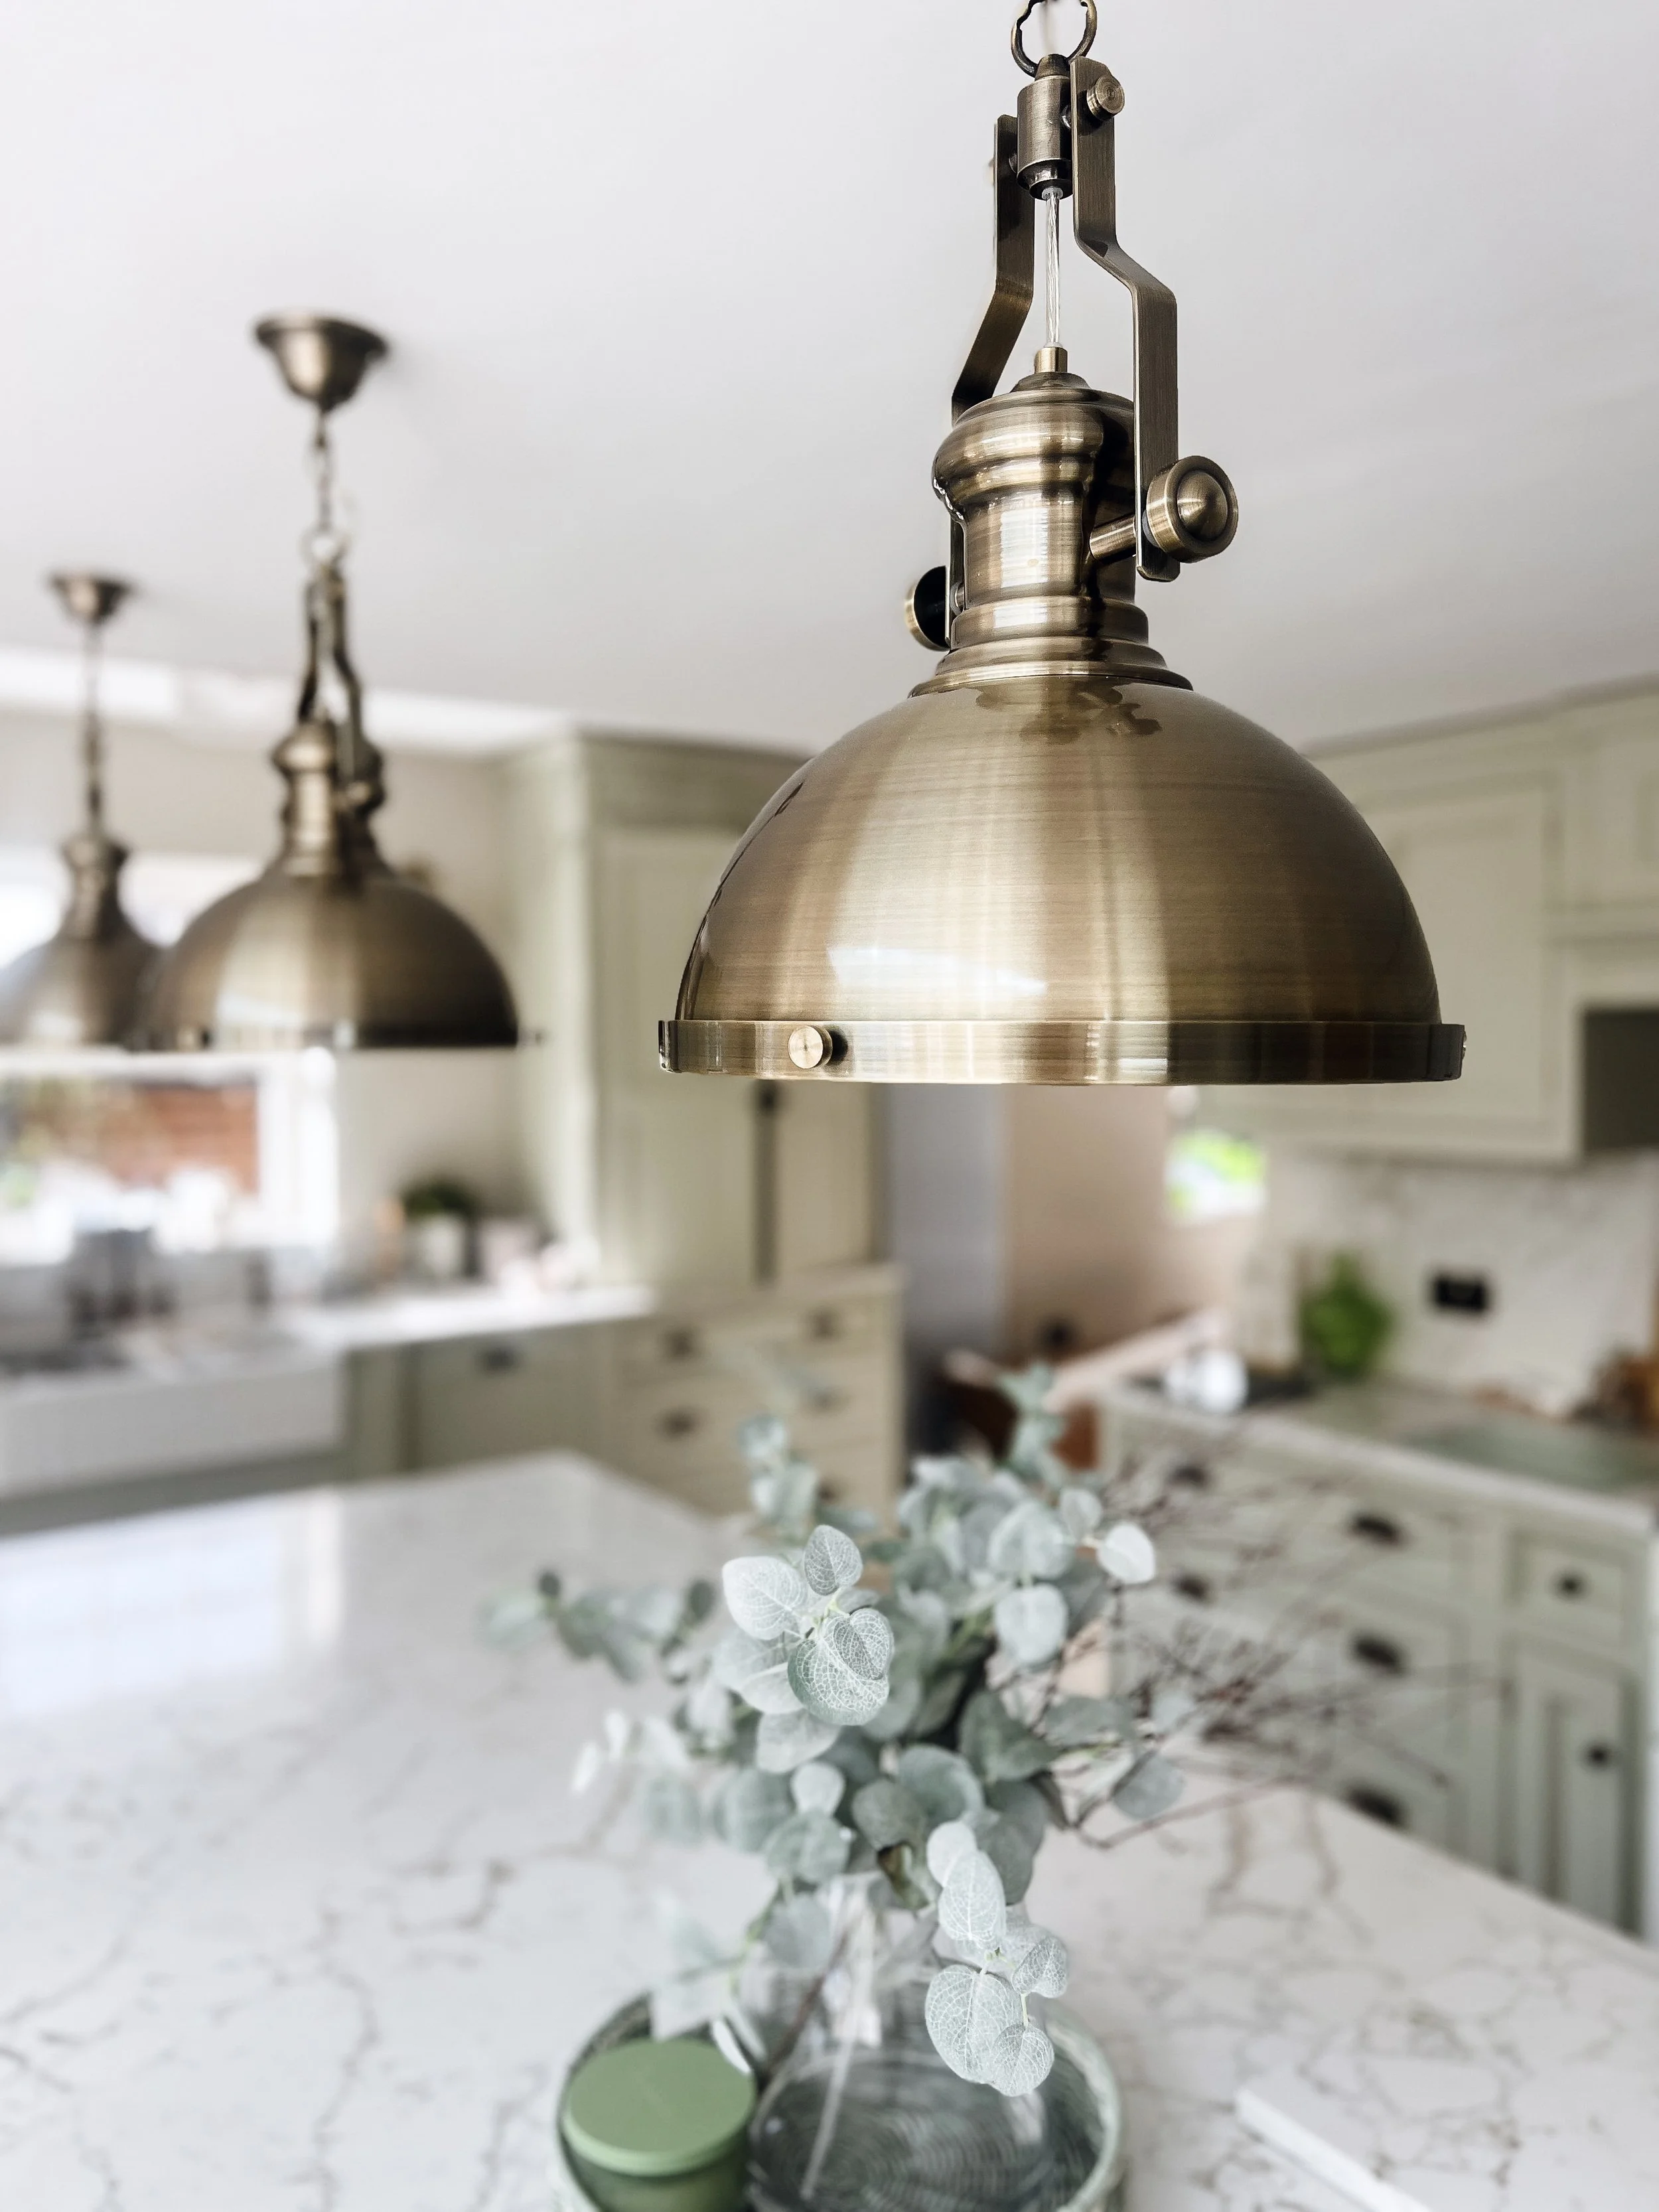
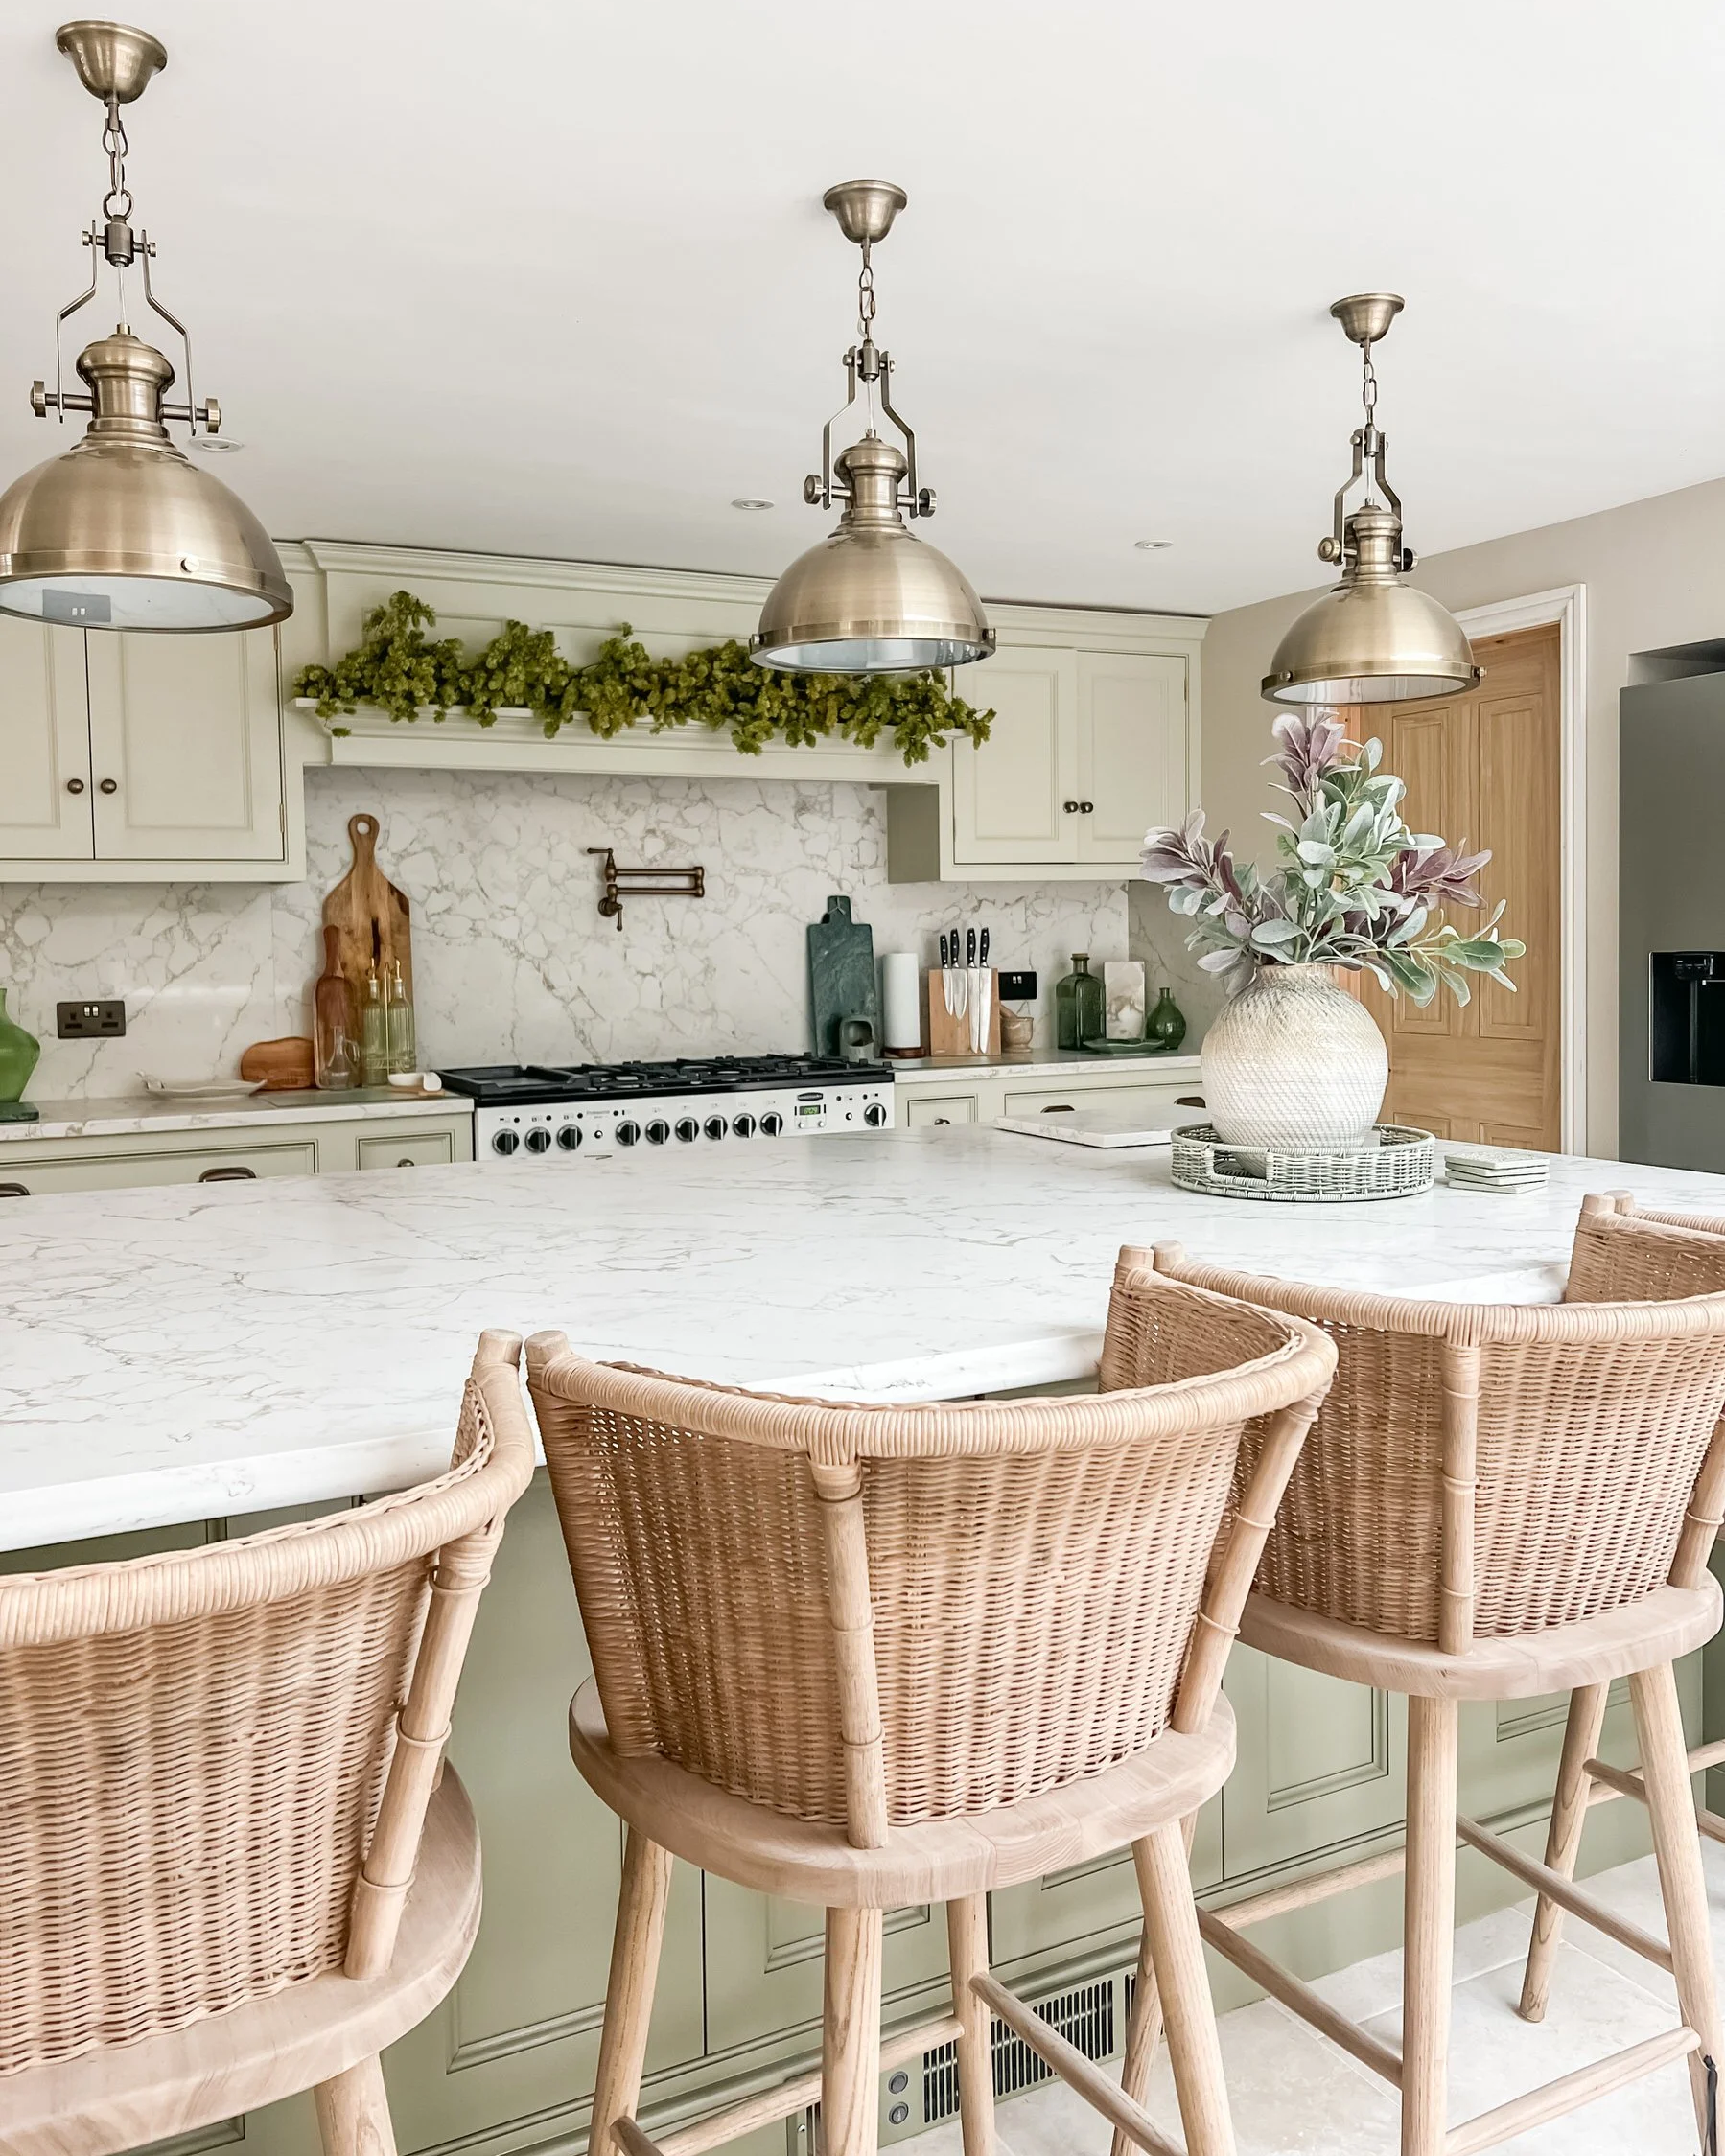
We designed the lighting around how we actually use the kitchen. The island has pendant lights that make a real statement — they’re stylish but still functional, casting a warm glow when we’re cooking, chatting, or having a glass of wine.
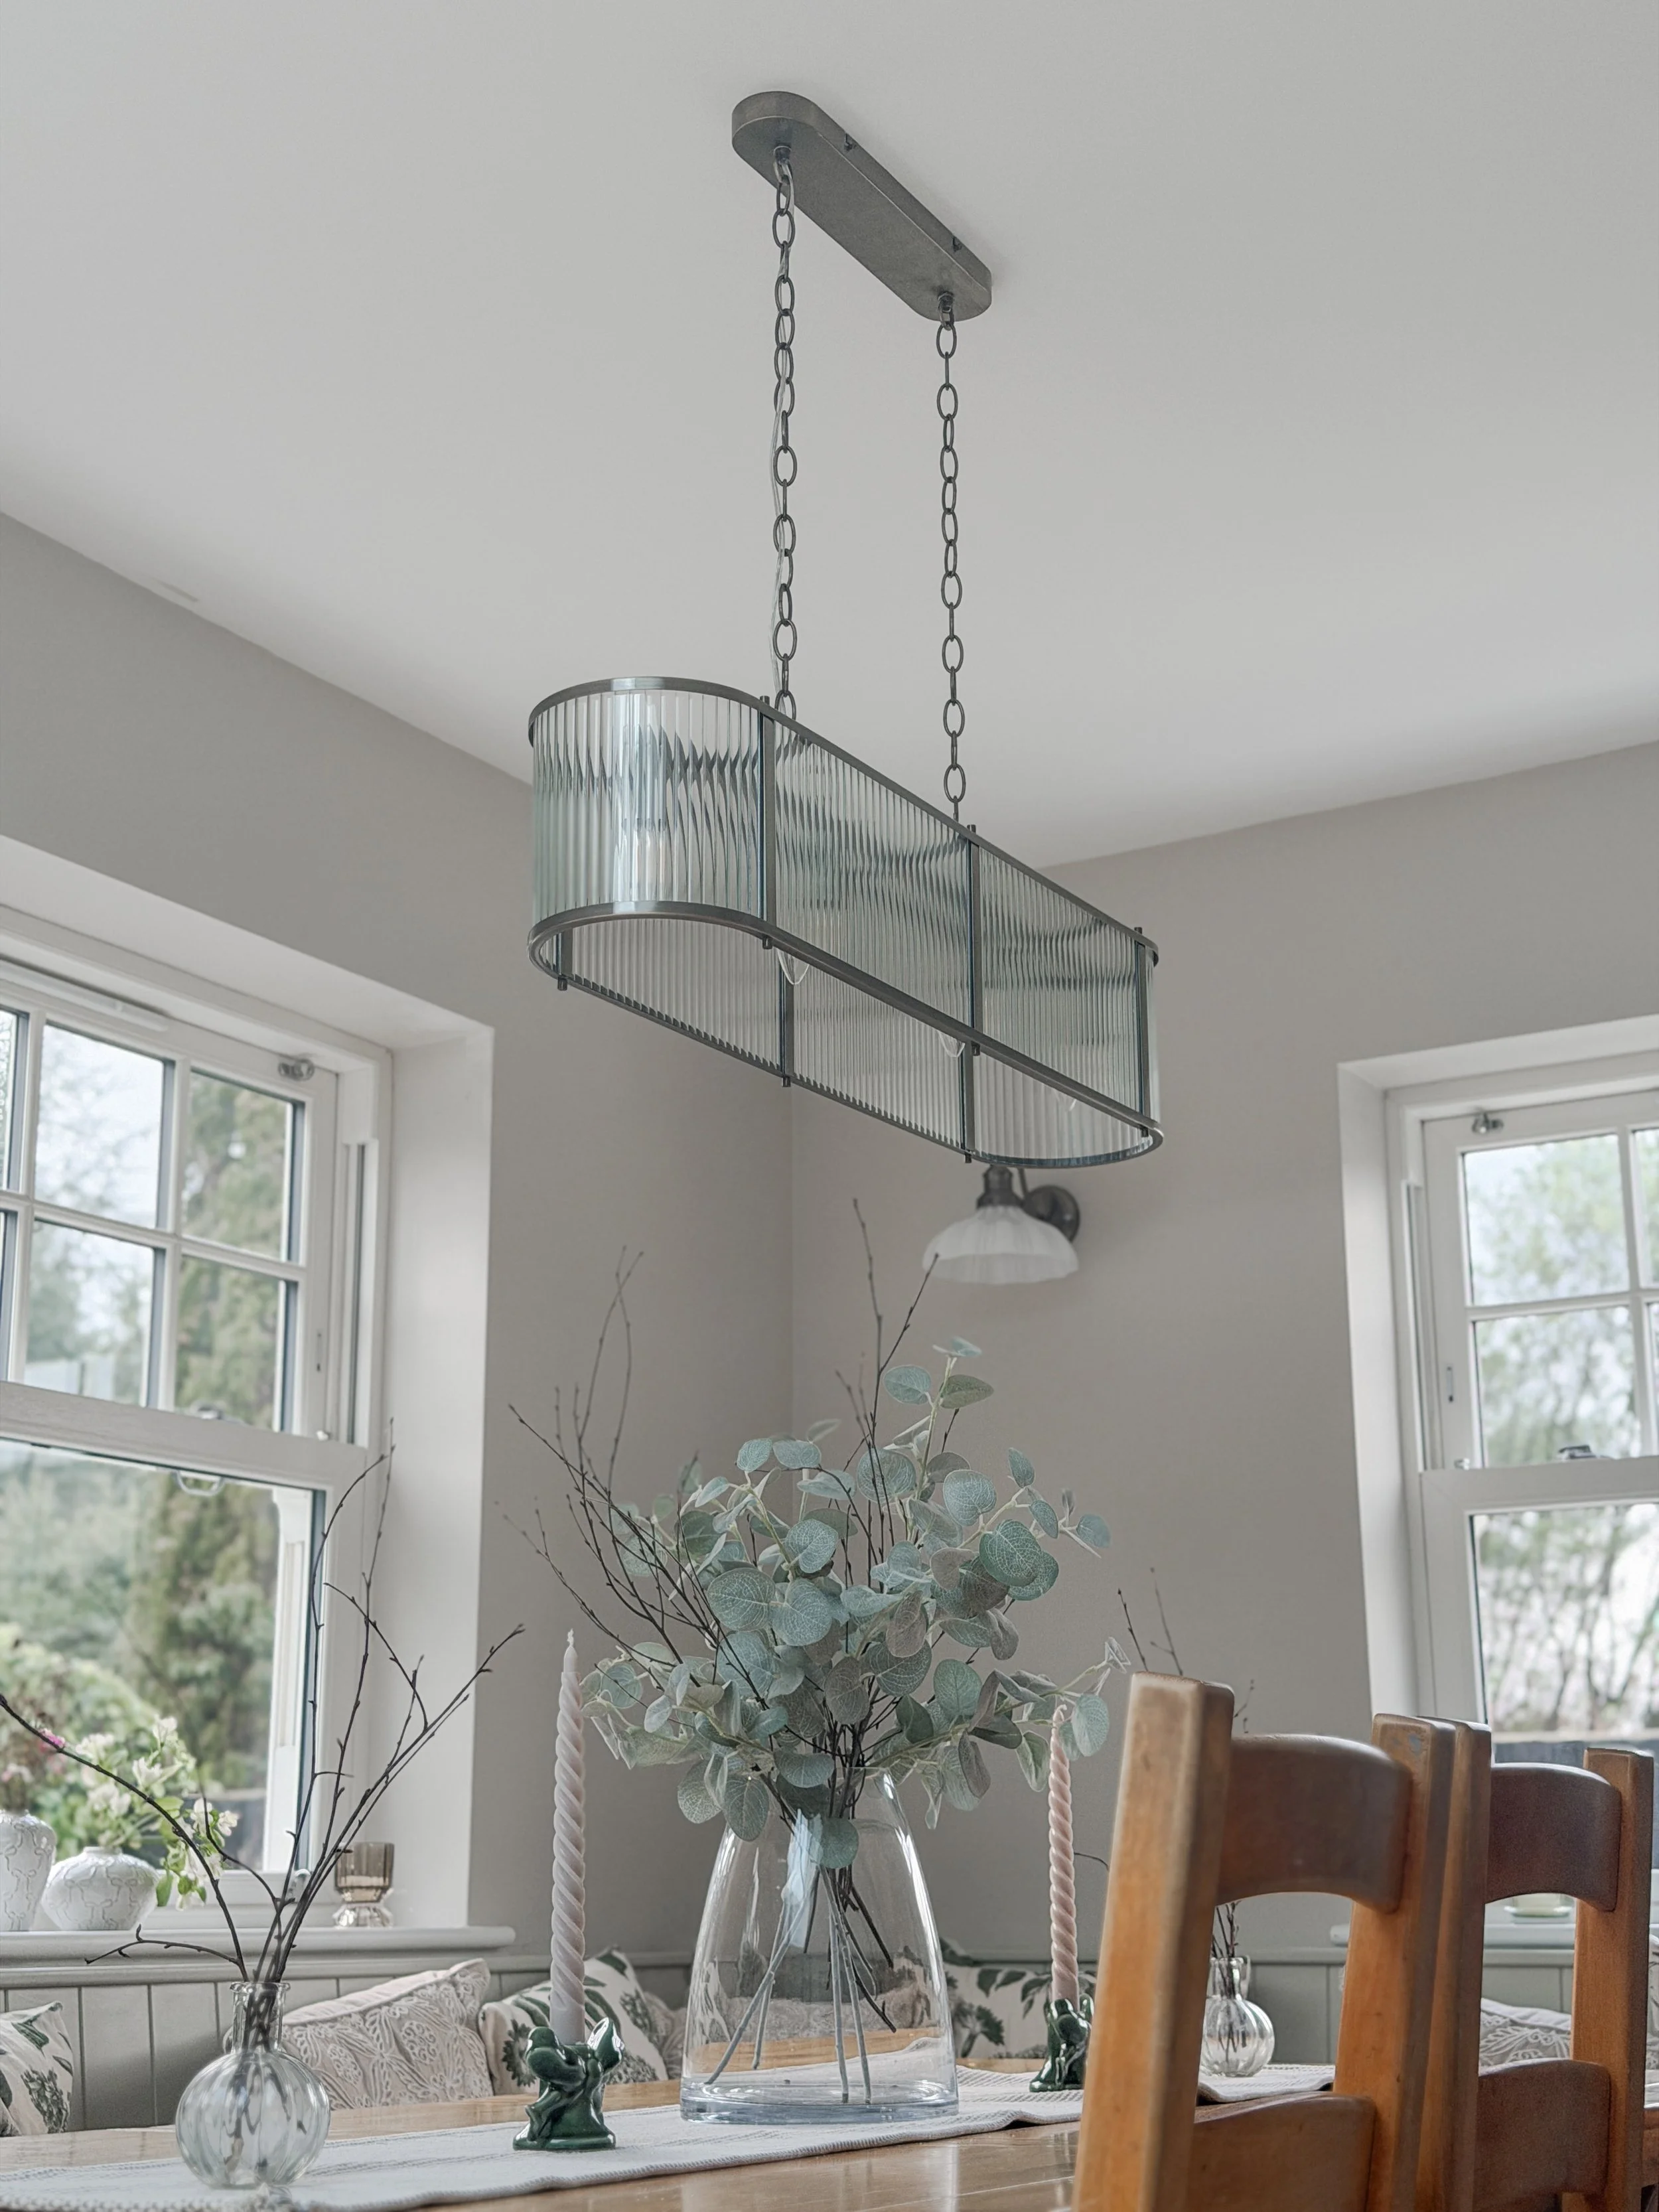
The dining table area features a beautiful glass pendant on a dimmer switch, perfect for creating that cosy, relaxed mood in the evenings. Then, on either side of the sink, I added wall lights — they’re not just practical for task lighting, but they also look gorgeous and add a lovely balance to that part of the room.
Lighting really does transform a space, but it’s not just about how many lights you have — it’s about where you place them and how you plan to use them.
Think about your zones: you’ll need task lighting where you prep and cook, and mood lighting in areas where you relax, eat, or entertain. And don’t underestimate the importance of switch placement either. It sounds small, but having your lights controlled in convenient places makes daily life so much easier (and stops you from doing laps around the kitchen every night!).
Tip: Add more lighting than you think you’ll need — you can always dim it down, but you can’t brighten a dark kitchen without rewiring! Think about how you’ve created different zones in your space and make sure each one has the right lighting for both tasks and ambience.
Step 6: A Kitchen That Feels Like Us
Most importantly, I wanted our kitchen to feel like home. Not like a showroom or something out of a catalogue, but ours.
We used warm neutrals, natural textures, and thoughtful details like ceramic knobs, open shelving, and framed prints. Every corner has a purpose, and it feels lived in, the kind of kitchen where you can spill flour, make endless cups of tea, and still have friends over for dinner.
My family will tell you I do like a show home kitchen — and yes, I admit, I like things tidy and clean! But after pouring so much thought and effort into this space, it deserves to be shown off. It’s practical, aesthetically beautiful, and above all else, it feels warm, inviting, and comfortable.
Natural materials were a must for me. I chose soft green tones because they just felt right — they bring the outside in, connect beautifully with our garden, and reflect the fact that we live right on the doorstep of the New Forest. Green is also calming, so it was the natural choice for creating a space that feels grounded and peaceful.
If you walk into our kitchen, you’ll find real family life happening in full swing: the kettle boiling, Dexter asleep on the rug, and usually me baking something I absolutely don’t need to eat. It’s not perfect, but it’s ours, and that’s exactly what makes it so special.
Tip: When it comes to finishing touches, choose what feels like you. Trends will come and go, but a kitchen that reflects your personality — from the colours to the handles to the memories made in it will always feel timeless.
Final Thoughts……..
Creating this kitchen has been one of the most rewarding parts of our renovation, not just because of how it looks, but because of how it feels. It’s a space that truly reflects our family and everything we love about living in Wisteria.
Our bespoke kitchen was crafted by Handmade Kitchens of Christchurch, who brought my vision to life down to the tiniest detail.
The beautiful stone worktops were supplied by RandAfabrications, who were a dream to work with! We chose Lydia Gold quartz.
The elegant, bronzed tap and pot filler are from Lusso Stone — both absolute standouts that elevate the space.
The Belfast sink, sourced from Tap Warehouse, adds that perfect timeless charm I’d always dreamed of.
Most of my kitchen accessories are from Homesense (my favourite shop ever for affordable, high-quality finds), and I love adding finishing touches from small businesses like Wisteria Tree — their beautiful bowls and candleholders bring warmth and personality to the space.
Every choice from the layout and lighting to the little details was made with purpose. It’s practical, full of character, and completely us.
If you’re planning your own kitchen renovation, my biggest advice is this: take your time, think about how you live, and design something that makes your heart happy every day. And when you finally get to stand in it, cup of tea in hand, you’ll know it was worth every decision.
I’d love to hear from you — what’s your dream kitchen feature, or the one thing you couldn’t live without?
Tell me in the comments below or over on Instagram at @livinginwisteria 💚
Hayley xx